Overview
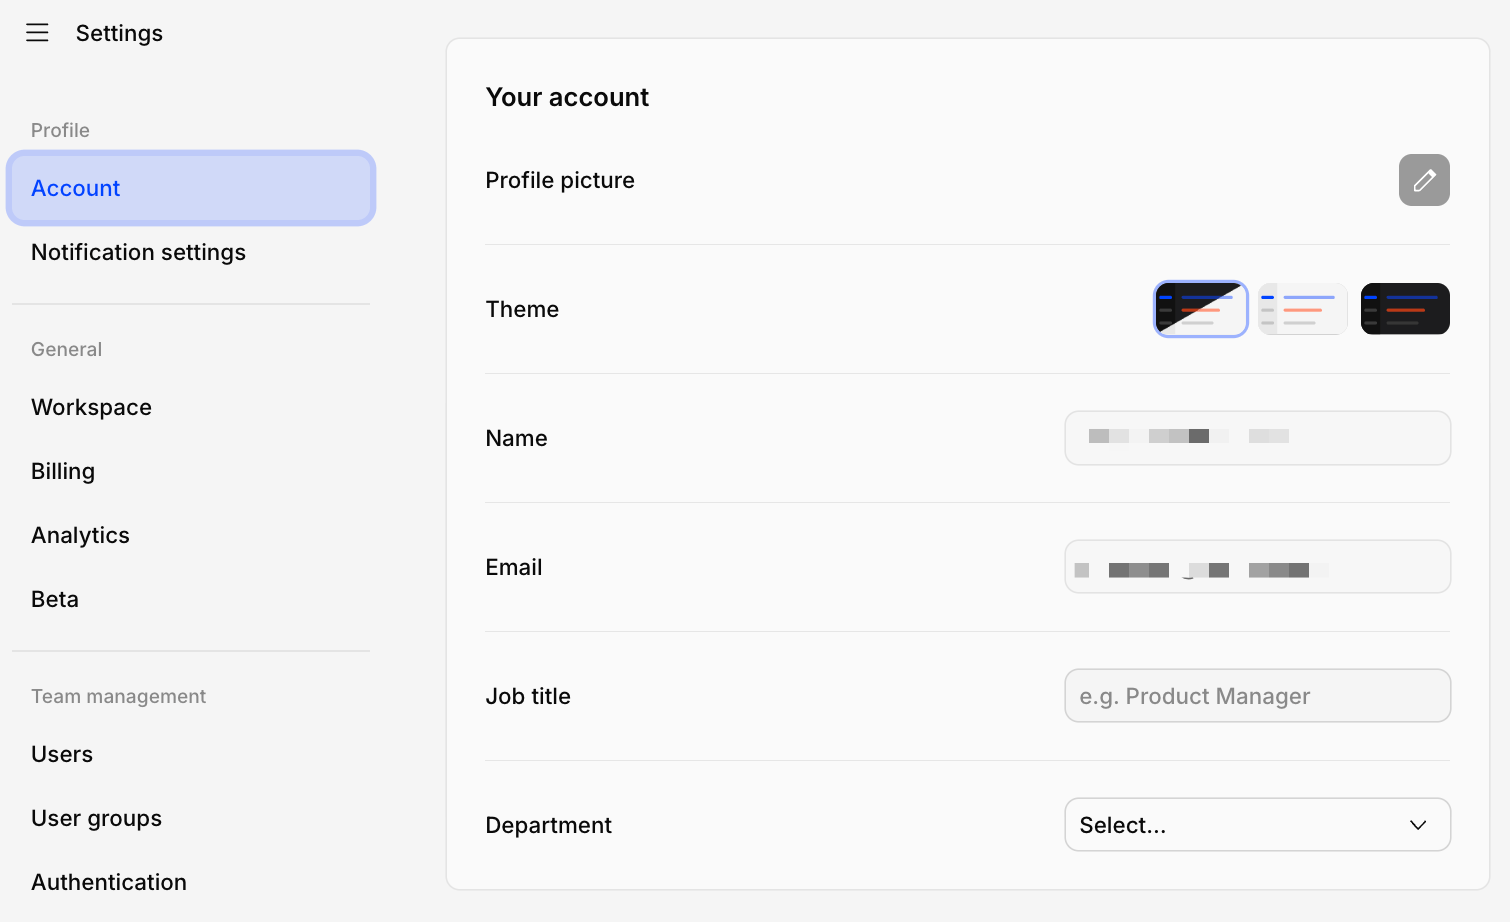
Every user has their own individual account settings. You can update your profile details (including name, email, job title, department/function, and profile photo), reset your password, and log out of sessions remotely. To navigate to Settings:- Click the (☰) icon at the top left corner of the page to open the main menu. Alternatively, press the [ keyboard shortcut.
- Click (…) More → Settings.
Change your profile photo
Help your teammates recognize you in Dovetail by setting a profile image for your user account.- To do this, go to ⚙️ Settings → Account → Profile picture and click on the pencil icon and click
Upload photo.
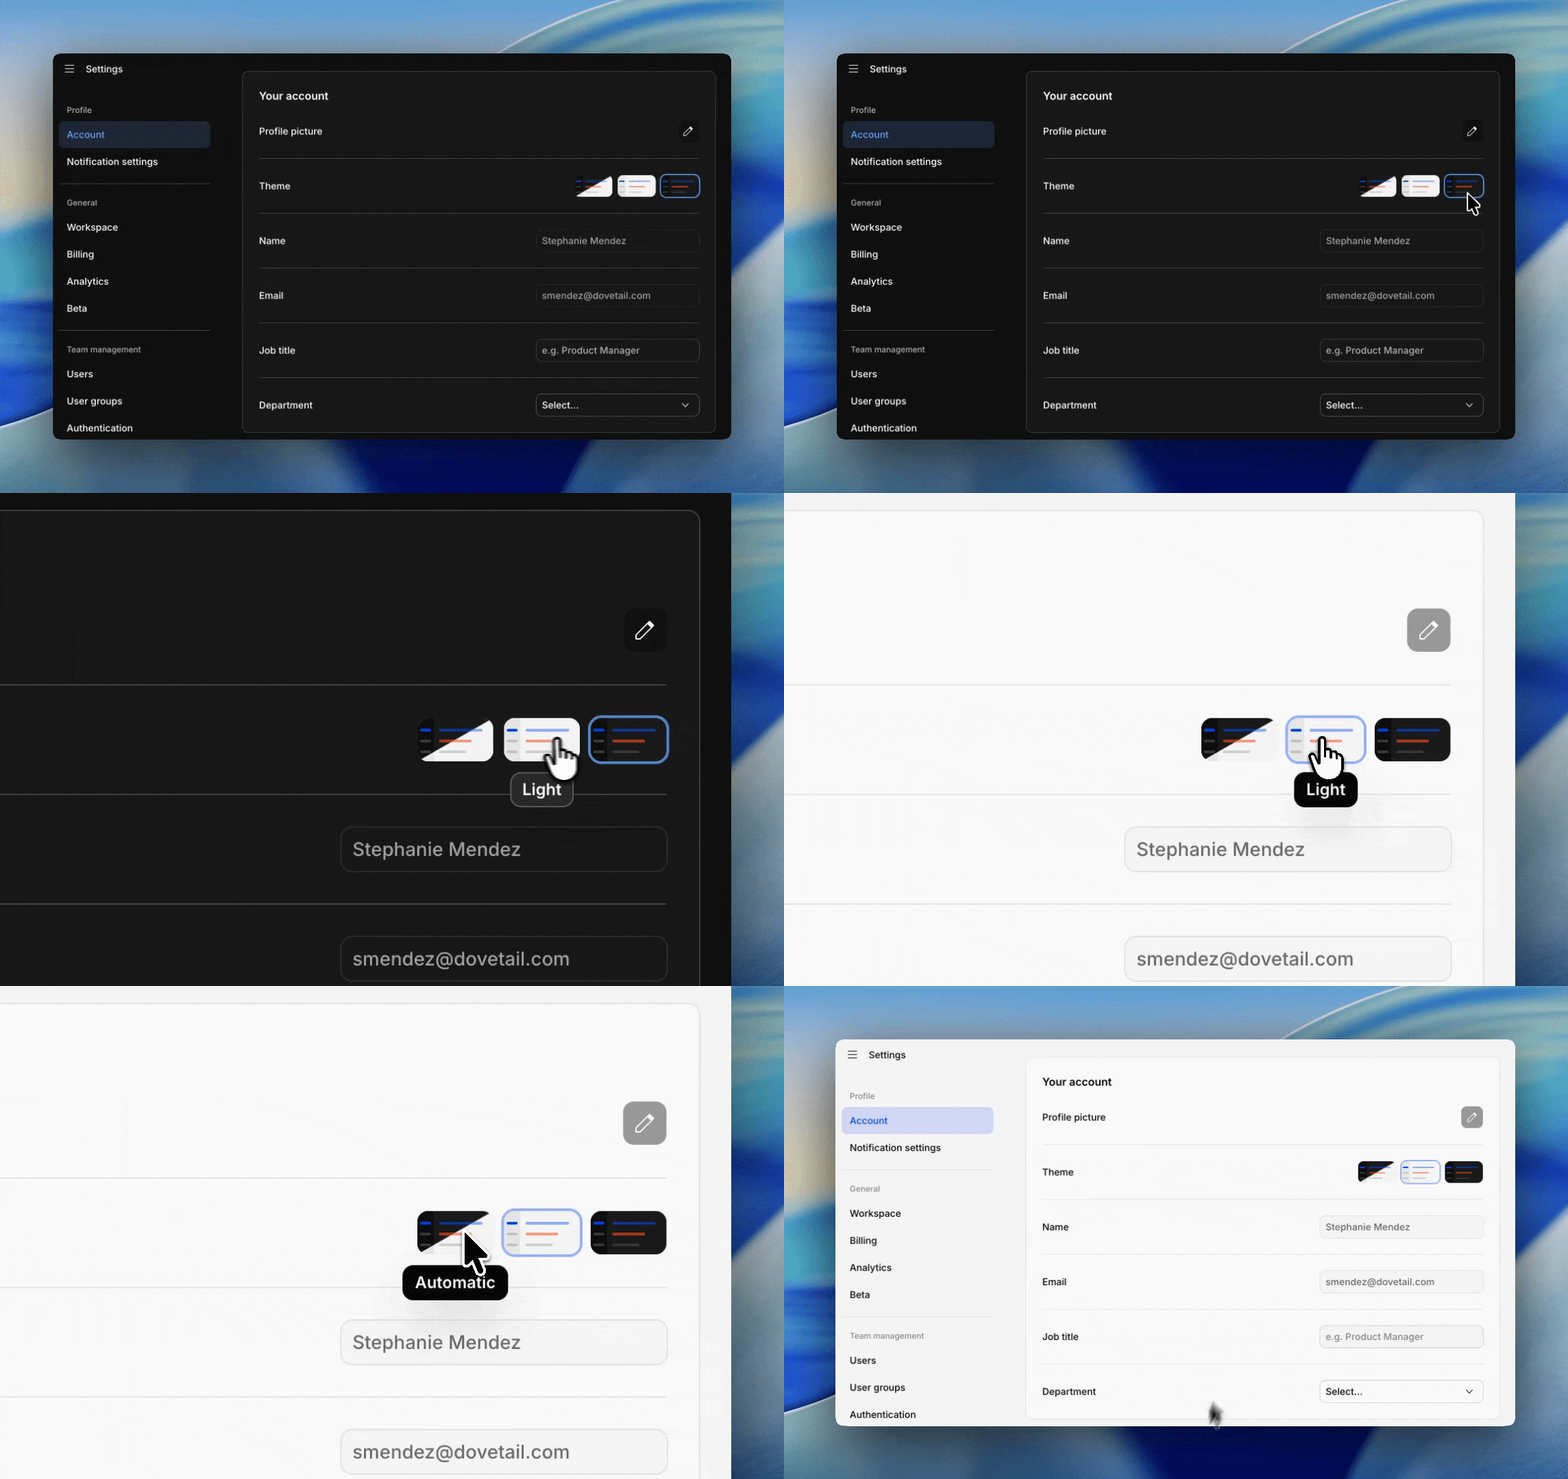
Change your interface theme
Change your user name
You can change the user name displayed in the workspace by:- Navigating to ⚙️ Settings → Account
- In the text box under Name, enter your updated name
- This will be saved automatically and updated across the workspace.
Change your email address
To change your email address:- Navigate to ⚙️ Settings → Account → Email
- In the text box, enter your updated email address.
- This will trigger an email to be sent to your new address and be saved automatically for future login.
Email already in use error
If you receive an “email already in use” error when updating your email address, the new email may already be associated with a Dovetail account — even if it does not appear in your workspace’s user list. This can happen when migrating users from one email domain to another. Contact support@dovetail.com with the affected email address so the team can investigate and resolve it.Change your password
If you have forgotten your password or wish to change it, open the login page, enter your email address, and press Continue.- If your email address is associated with only one workspace, select
Reset passwordbelow the form. From there, check your email and follow the instructions to reset your password. - If your email address is associated with multiple workspaces, check your email to verify your address, select the workspace you’d like to reset your password for, and click
Reset passwordbelow the form. From there, check your email and follow the instructions.
Log in with Microsoft or Google
You can log in to Dovetail in one click via OAuth 2.0 with your Google or Microsoft account. By using OAuth 2.0 to create your account, you’ll be able to log in faster without needing to set a password with Dovetail.Add a password to your account
If you originally signed up for Dovetail using Google or Microsoft, you can add a password to your account as an additional sign-in method. Adding a password allows you to log in using either:- Continue with Google or Continue with Microsoft, or
- Your email address and password
- Navigate to Settings → Account.
- Scroll to the How you log in section.
- Next to Password, select Add password.
- Follow the prompts to create a password for your account.
Troubleshooting login
-
Confirm your email address
Make sure you’re signing in with the same email address you originally used to join Dovetail. Once confirmed, try resetting your password. -
Check if your account is locked
As a security precaution, Dovetail automatically locks accounts after multiple unsuccessful login attempts or unusual activity.To unlock your account:- Go to the log in page, enter your email address, and click Continue.
- Follow the steps that apply to you: If your email is associated with one workspace:
- Click Unlock account below the form.
- Check your email and follow the instructions. If your email is associated with multiple workspaces:
- Check your email to verify your address.
- Select the workspace you’re locked out of.
- Click Unlock account below the form.
- Check your email and follow the instructions.
-
Not receiving emails?
If you aren’t getting any Dovetail emails, contact your organization’s IT team. Ask them to allow-list:
mail.dovetailapp.comdovetailapp.com
Two-factor authentication (2FA)
Add an extra layer of security to your account by enabling two-factor authentication. Once turned on, you’ll enter a code from an authenticator app (like Google Authenticator, Authy, or 1Password) each time you sign in, so your account stays protected even if your password is compromised. Note: 2FA is available only for users who sign in with a password. If you sign in via SSO, Google, or Microsoft, 2FA isn’t available in Dovetail — your identity provider may enforce its own MFA policies instead. To set up 2FA:- Navigate to ⚙️ Settings → Account
- Scroll to the Multi-factor authentication section
- Click Enable and scan the QR code with your authenticator app
- Enter the 6-digit verification code and click Continue
Support access consent
Managers and Contributors (paid seats) can grant Dovetail employees temporary access to their workspace for support purposes.Grant support access
When chatting with our support team, you may be asked to consent to access your account to help with troubleshooting or recovery. If you are a Manager or Contributor, you can grant support access by following the steps below. If you are a Viewer, you will need to ask a user with a paid seat to grant support access for you.- Navigate to ⚙️ Settings
- Click on
Account - Navigate to
Support accessand clickAllow support access
Revoke support access
To revoke support access before the specified expiration date, Managers and Contributors will need to follow the same steps used to grant access.- Navigate to ⚙️ Settings
- Click on
Account - Navigate to
Support accessand clickRevoke support access
Reset preferences
Reset all user preferences, contextual help panels, and onboarding tours by navigating to ⚙️ Settings → Account → ResetLeave a workspace
Workspaces must have at least one admin, so the last person in a workspace will not be able to leave that workspace.- To leave a workspace you’re in, open ⚙️ Settings → Users to locate your user and select
Revoke userin•••menu.
Delete your Dovetail account
Deleting your personal Dovetail account is different from leaving or deleting a workspace.- Leave a workspace removes you from that workspace. Your personal Dovetail account still exists and you can access other workspaces you may be a part of.
- Delete a workspace permanently removes the workspace and all its data.
FAQs:
I am receiving an error when logging in. What troubleshooting steps can I take?
I am receiving an error when logging in. What troubleshooting steps can I take?
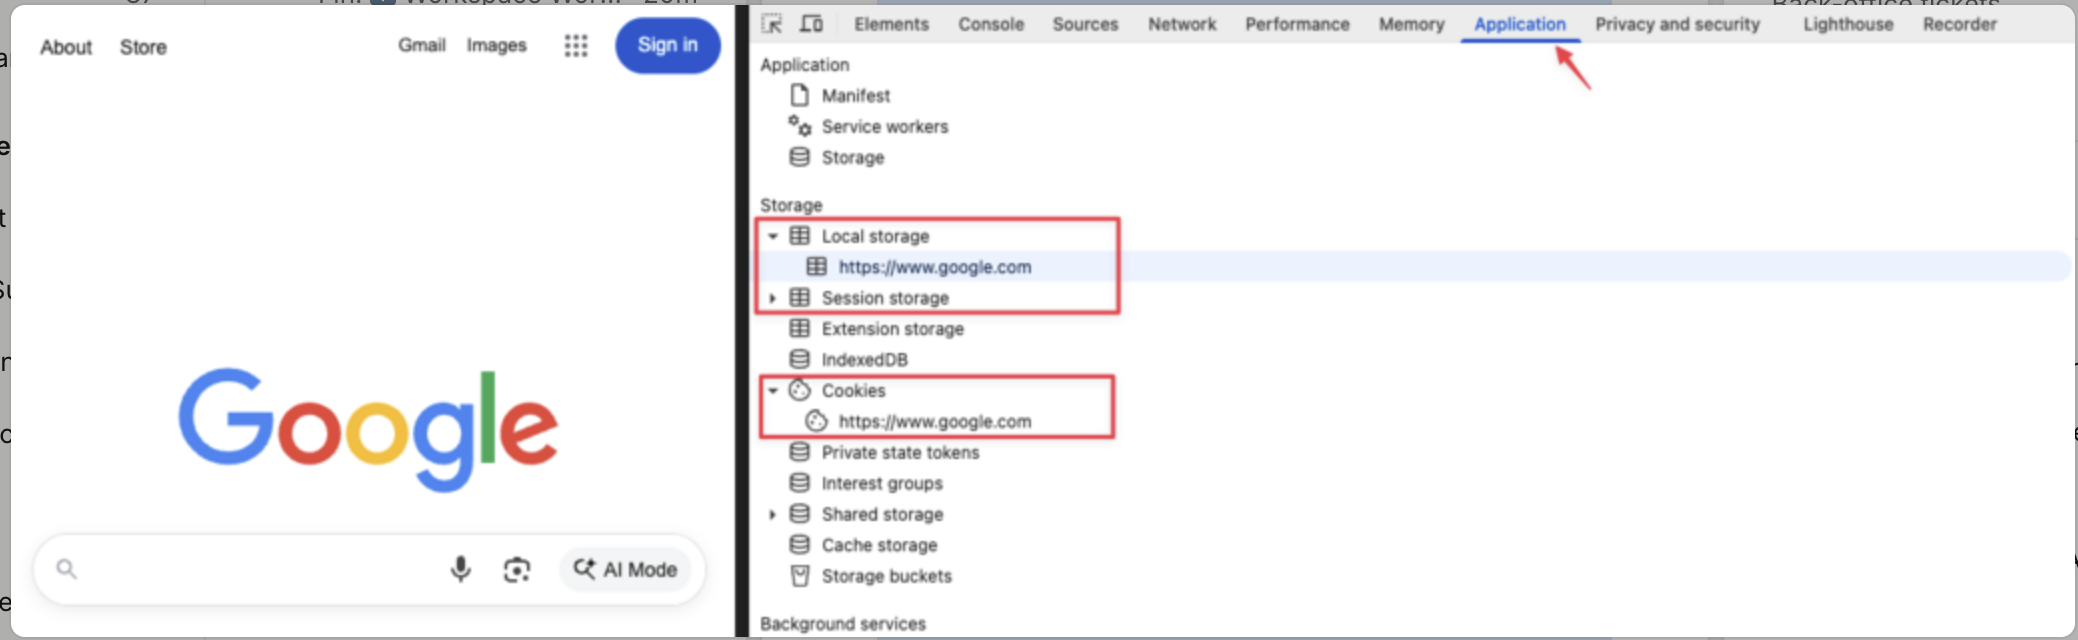
Try clearing your browser’s stored data for Dovetail by following these steps:
- Right-click anywhere on the page and choose “Inspect.”
- In the panel that opens, click the “Application” tab.
- Under “Storage,” you’ll see sections for Local Storage, Session Storage, and Cookies.
-
For each one, right-click on the site name (or any listed items) and select “Clear.”