Documentation Index
Fetch the complete documentation index at: https://docs.dovetail.com/llms.txt
Use this file to discover all available pages before exploring further.
Highlights and tags are available on all Free, Professional, and Enterprise plans. However, creating custom tags is only available on Professional and Enterprise plans.
Managers and Contributors can create highlights and tags.
Managers and Contributors can create highlights and tags.
Overview
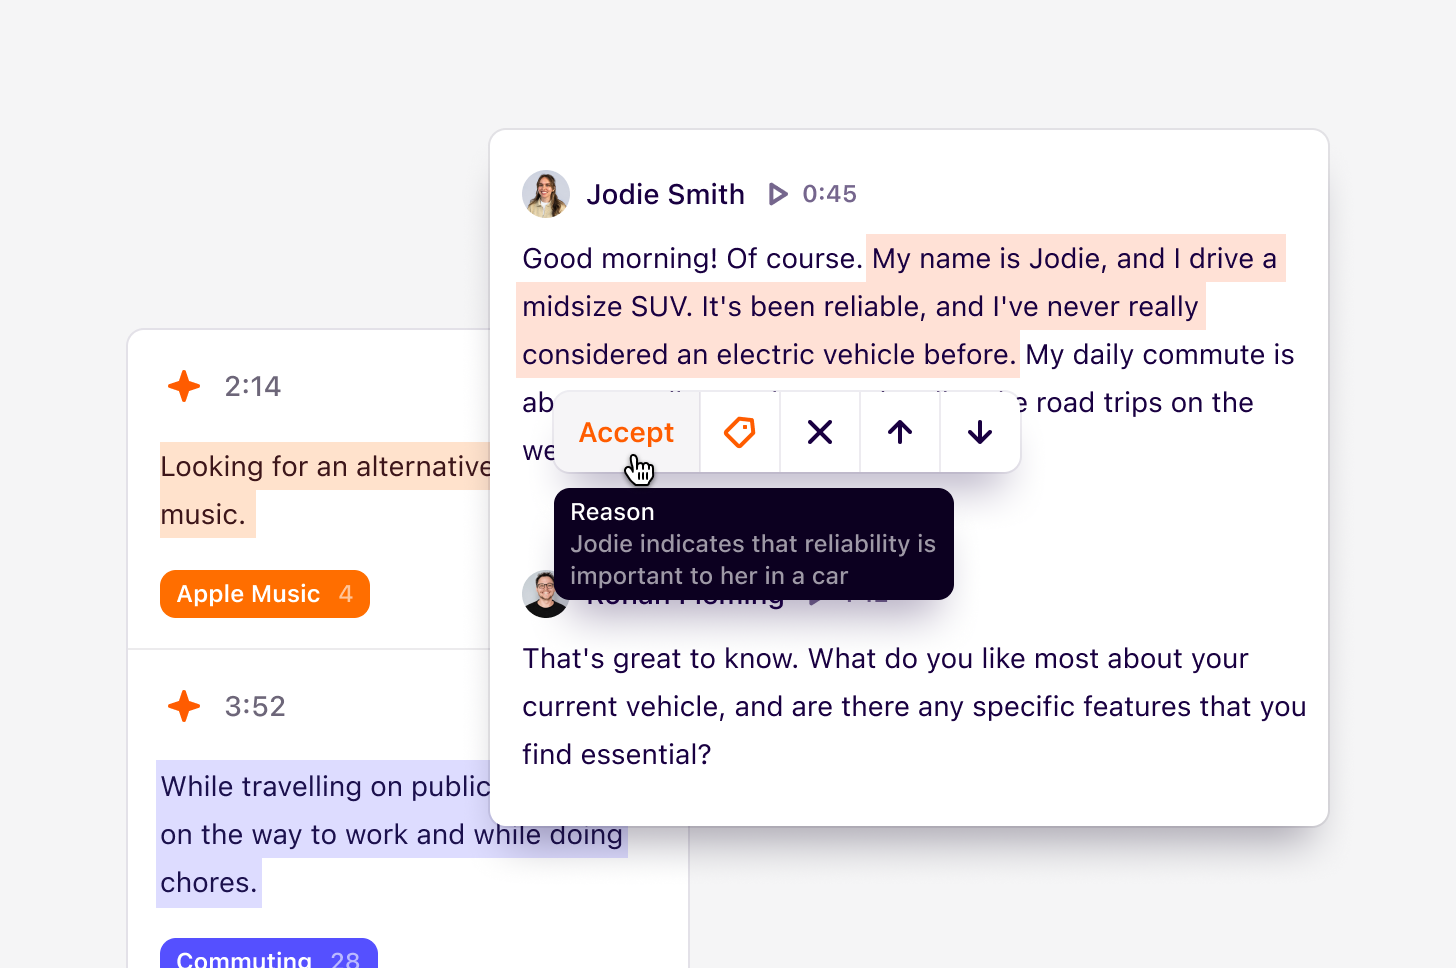
The power of Dovetail lies in highlighting and breaking down key information in text, documents, or video transcripts. These highlights can be grouped under tags, embedded, and shared in insights to connect your findings back to the raw data collected. Highlights made in transcripts from video and audio content create individual, searchable clips. These clips are a powerful way to share stories about your research and bring your customers into the room.Create highlights for important moments
You can surface information in your data by highlighting text in data added to a project. This could be text in transcripts created from a customer call or documents like industry reviews, presentations, or academic papers. There are two ways to create highlights in your data:- Manual
- With AI
- To create a highlight, select a section of text in your data and select
Highlightfrom the action menu.
View all highlights within data
You can quickly view all highlights within data from the data sidebar . Simply open the highlights tab by pressing the highlight icon on the right-hand side of your data. Here, you’ll see all highlights in the order that they appear on your data. Clicking on a highlight in the data sidebar will scroll to the relevant section of the Data content.Resize your highlights
You can adjust the start or end position of your highlights by clicking on the highlight and moving drag handles.At this time, highlights in a document cannot be resized once they’re created. If you need to make any changes, you must remove the highlight and create it again.
Watch a highlights only video
Once you’ve started creating highlights on data with video or audio files, you’ll see a new tab appear above the video/audio player at the top of your data titled Highlights only. Navigating to this tab will present you with a condensed version of your video/audio that contains only the highlighted sections. You can also download and share this video to others. To do this, selectDownload from within the video player.
Share a highlight
You can quickly share a highlight with your team while reviewing your data.- To do this, click on your highlight and select
Share. - From there, select
Copy link to highlightand paste this link in Slack, Teams, Notion, or other available tools for others to preview the highlighted content.
Group highlights under a tag
Tags help you group related highlights together. A single highlight can have one or many tags associated with it, and a single tag can have many highlights associated with it. Tags can be created from two places:- Within data: Drag over a section of text within your data, and select
Tagfrom the action menu. From there, you can create a new tag to group your highlight under. - On a tag board: By opening a tag board, you can create a new tag by selecting
+ New tagfrom any group within the board.
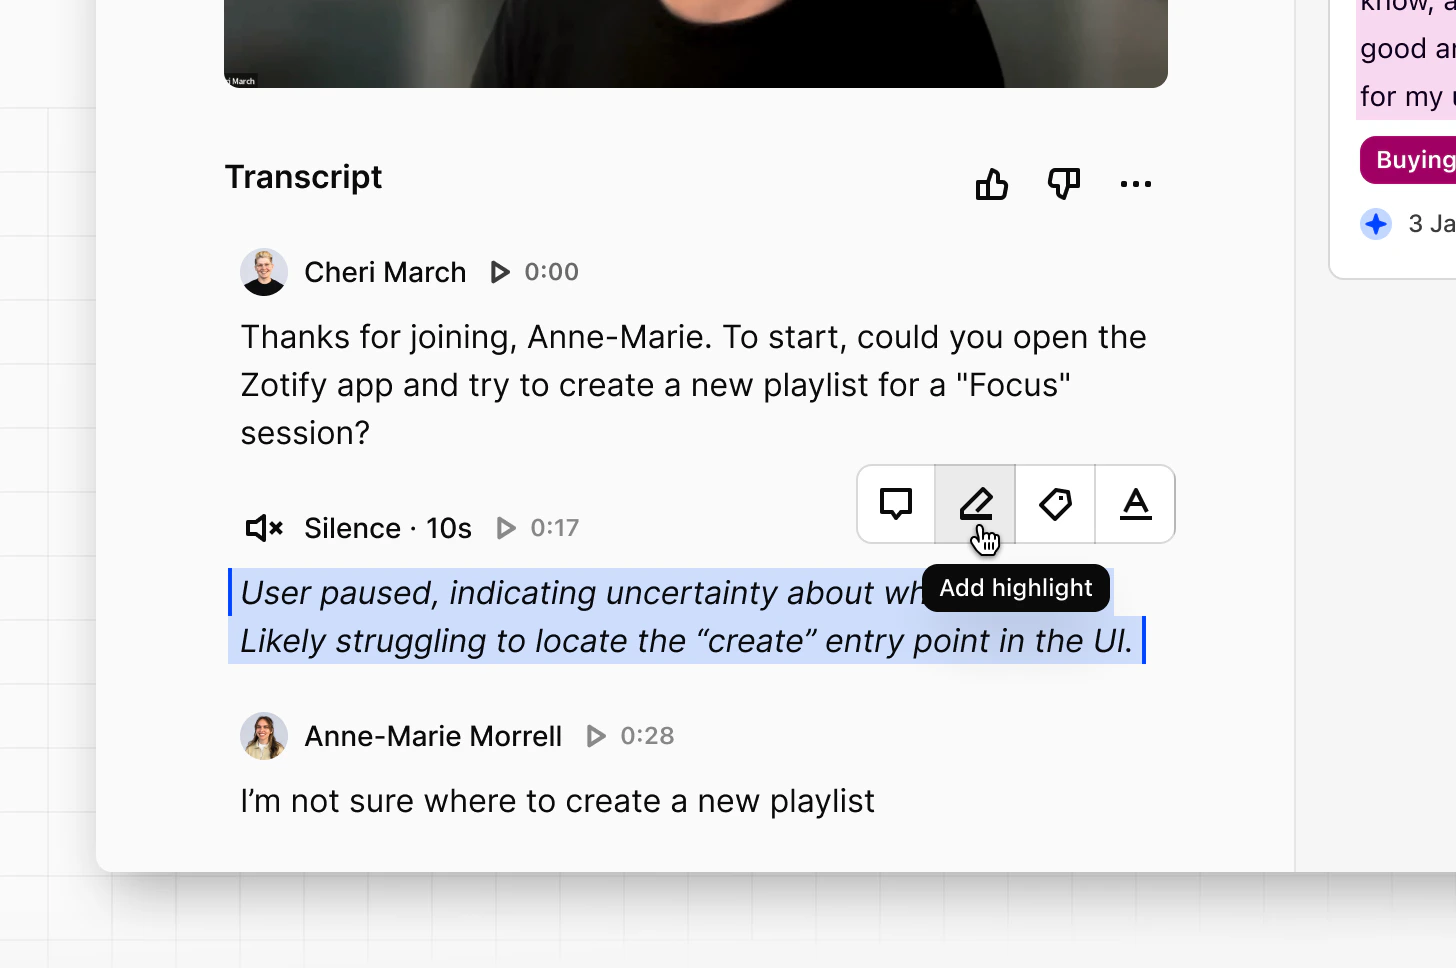
Highlight silence within video and audio transcripts
You can highlight moments of silence within video and audio transcripts, helping you identify meaningful non-verbal moments. Periods of silence can indicate when participants are confused, thinking deeply, struggling to complete a task, or reacting to something unexpected. By using the highlight silence feature, you can quickly identify important points in interviews, usability tests, or observational research where participant behaviour reveals friction or uncertainty that may not appear in spoken responses, helping you make meaningful improvements to the experience of your products. Silence detection is particularly valuable for:- Usability testing — identifying where users hesitate or struggle
- Gameplay research — observing moments of focus or confusion
- Observational research — capturing behavior without verbal explanation
- User interviews — identifying pauses before participants respond
Enabling highlight silence
You can enable silence detection directly from the transcript view.- Open a transcript
- Open
Transcript options - Select
Detect silence - Choose
Maximum interval
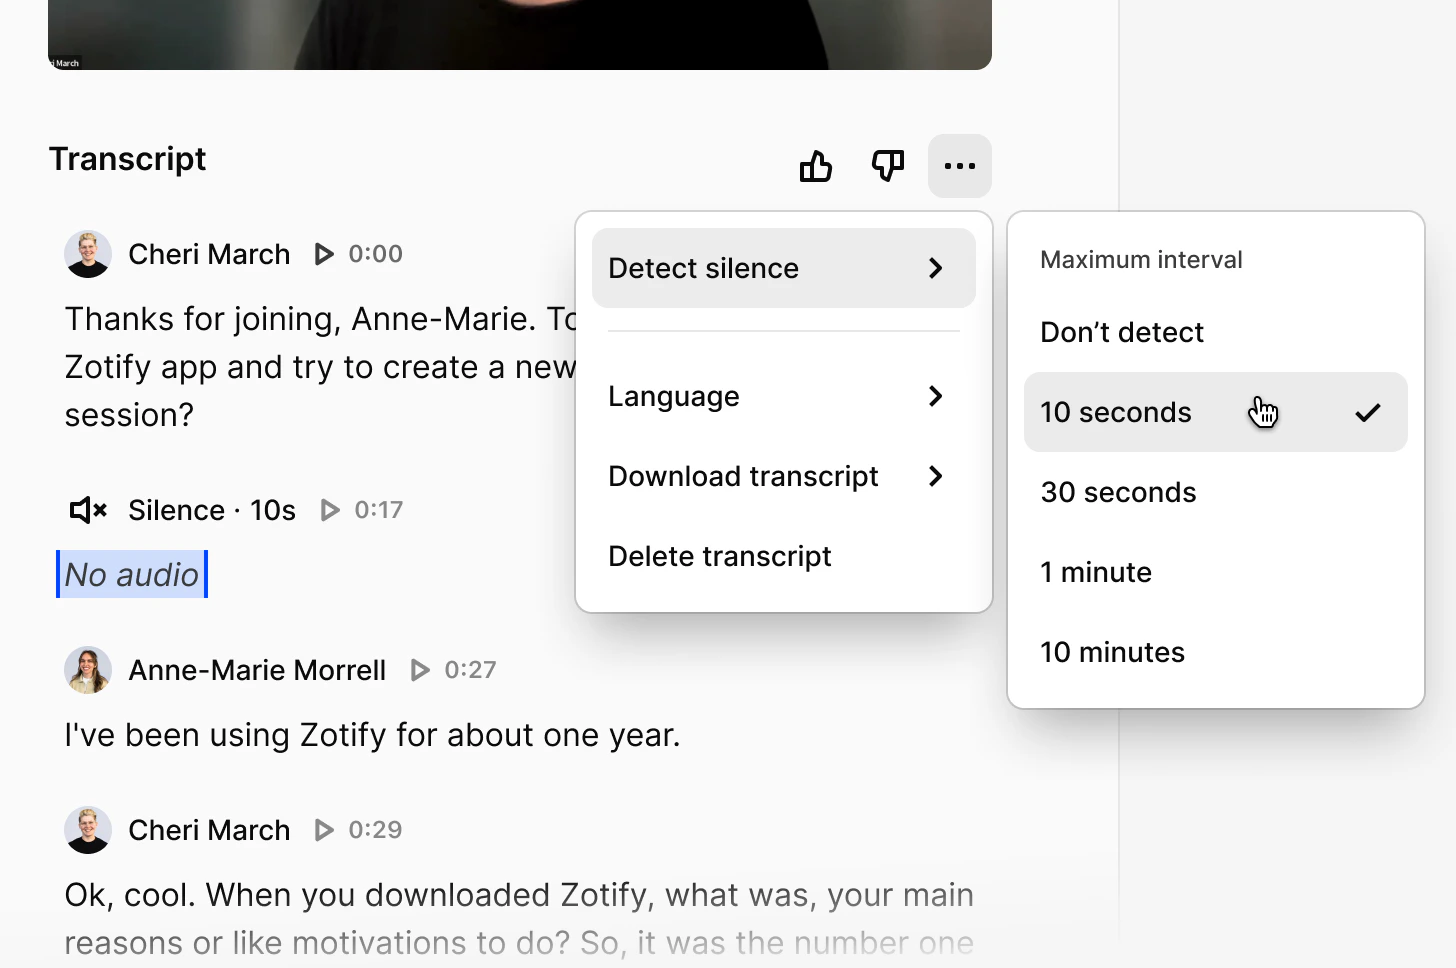
Adjust the silence interval
You can adjust the silence interval to control how long a pause must be before it appears as a separate line in the transcript. When a pause exceeds your selected threshold, it will be split out as its own line, making it easier to identify and review moments of silence. For example, you might choose:- 10 seconds to capture shorter pauses or hesitation
- 30 seconds to highlight more meaningful gaps in conversation or product usage
- 1 minute to surface longer periods of inactivity or task completion
Create highlights, tags and reels from silent moments
After silence has been detected, you can convert these moments into highlights.- Navigate to a detected silence moment in the transcript. This will be displayed on a separate line as
No audiowithin the transcript - Manually change the text from
No audioto your desired annotation - Create a highlight, or add a tag or comment
Create highlights via API
Developers can also create transcript highlights programmatically using the API. See the API referenceFAQs
I'm not able to highlight and tag my data. How can I fix this?
I'm not able to highlight and tag my data. How can I fix this?
There may be a few reasons for this!
- Your data may be locked from editing. The ability to edit your data can be toggled on/off in the top right corner of the data page.
- You may not have the right workspace role. Reach out to your workspace’s admin to update your access to Manager or Contributor to edit project work in the workspace.
- You may not have the right project access to edit the project. Check the project’s Share settings to review your access and reach out to someone with Full access to update your access.
Can I use magic highlight to surface suggested highlights on files like a PDF document?
Can I use magic highlight to surface suggested highlights on files like a PDF document?
At this time, magic highlight will only suggest highlights on transcripts and text. You will not be able to suggest highlights on file documents such Word or PDFs.